- Published on
Integrating Razorpay with Next.js: A Step-by-Step Guide
If you're selling a product or service targeting Indian audiences, then you may be using or thinking about using Razorpay.
Razorpay is a payment gateway company that helps you to accept payments online. It is being used by a wide range of companies, from Zoho to Zomato. They also offer other services like credit cards and payroll, banking api.
Personally, I like their credit card in my company's name. We'll know how much pain it is to get credit card in your company's name unless you're doing lots of money
In this article, let's see how we can use Razorpay for our one-time payment.
With our approach, you can even do dynamic pricing (change the amount on the fly) similar to that of Integrating with Chargebee that we've talked about recently.
Let's get started!
Step 0: Installing Dependency & Getting API Keys
We'll need to use these packages in our backend.
npm install razorpay shortid
To get your API credentials, go to the Razorpay dashboard and choose test/live mode.
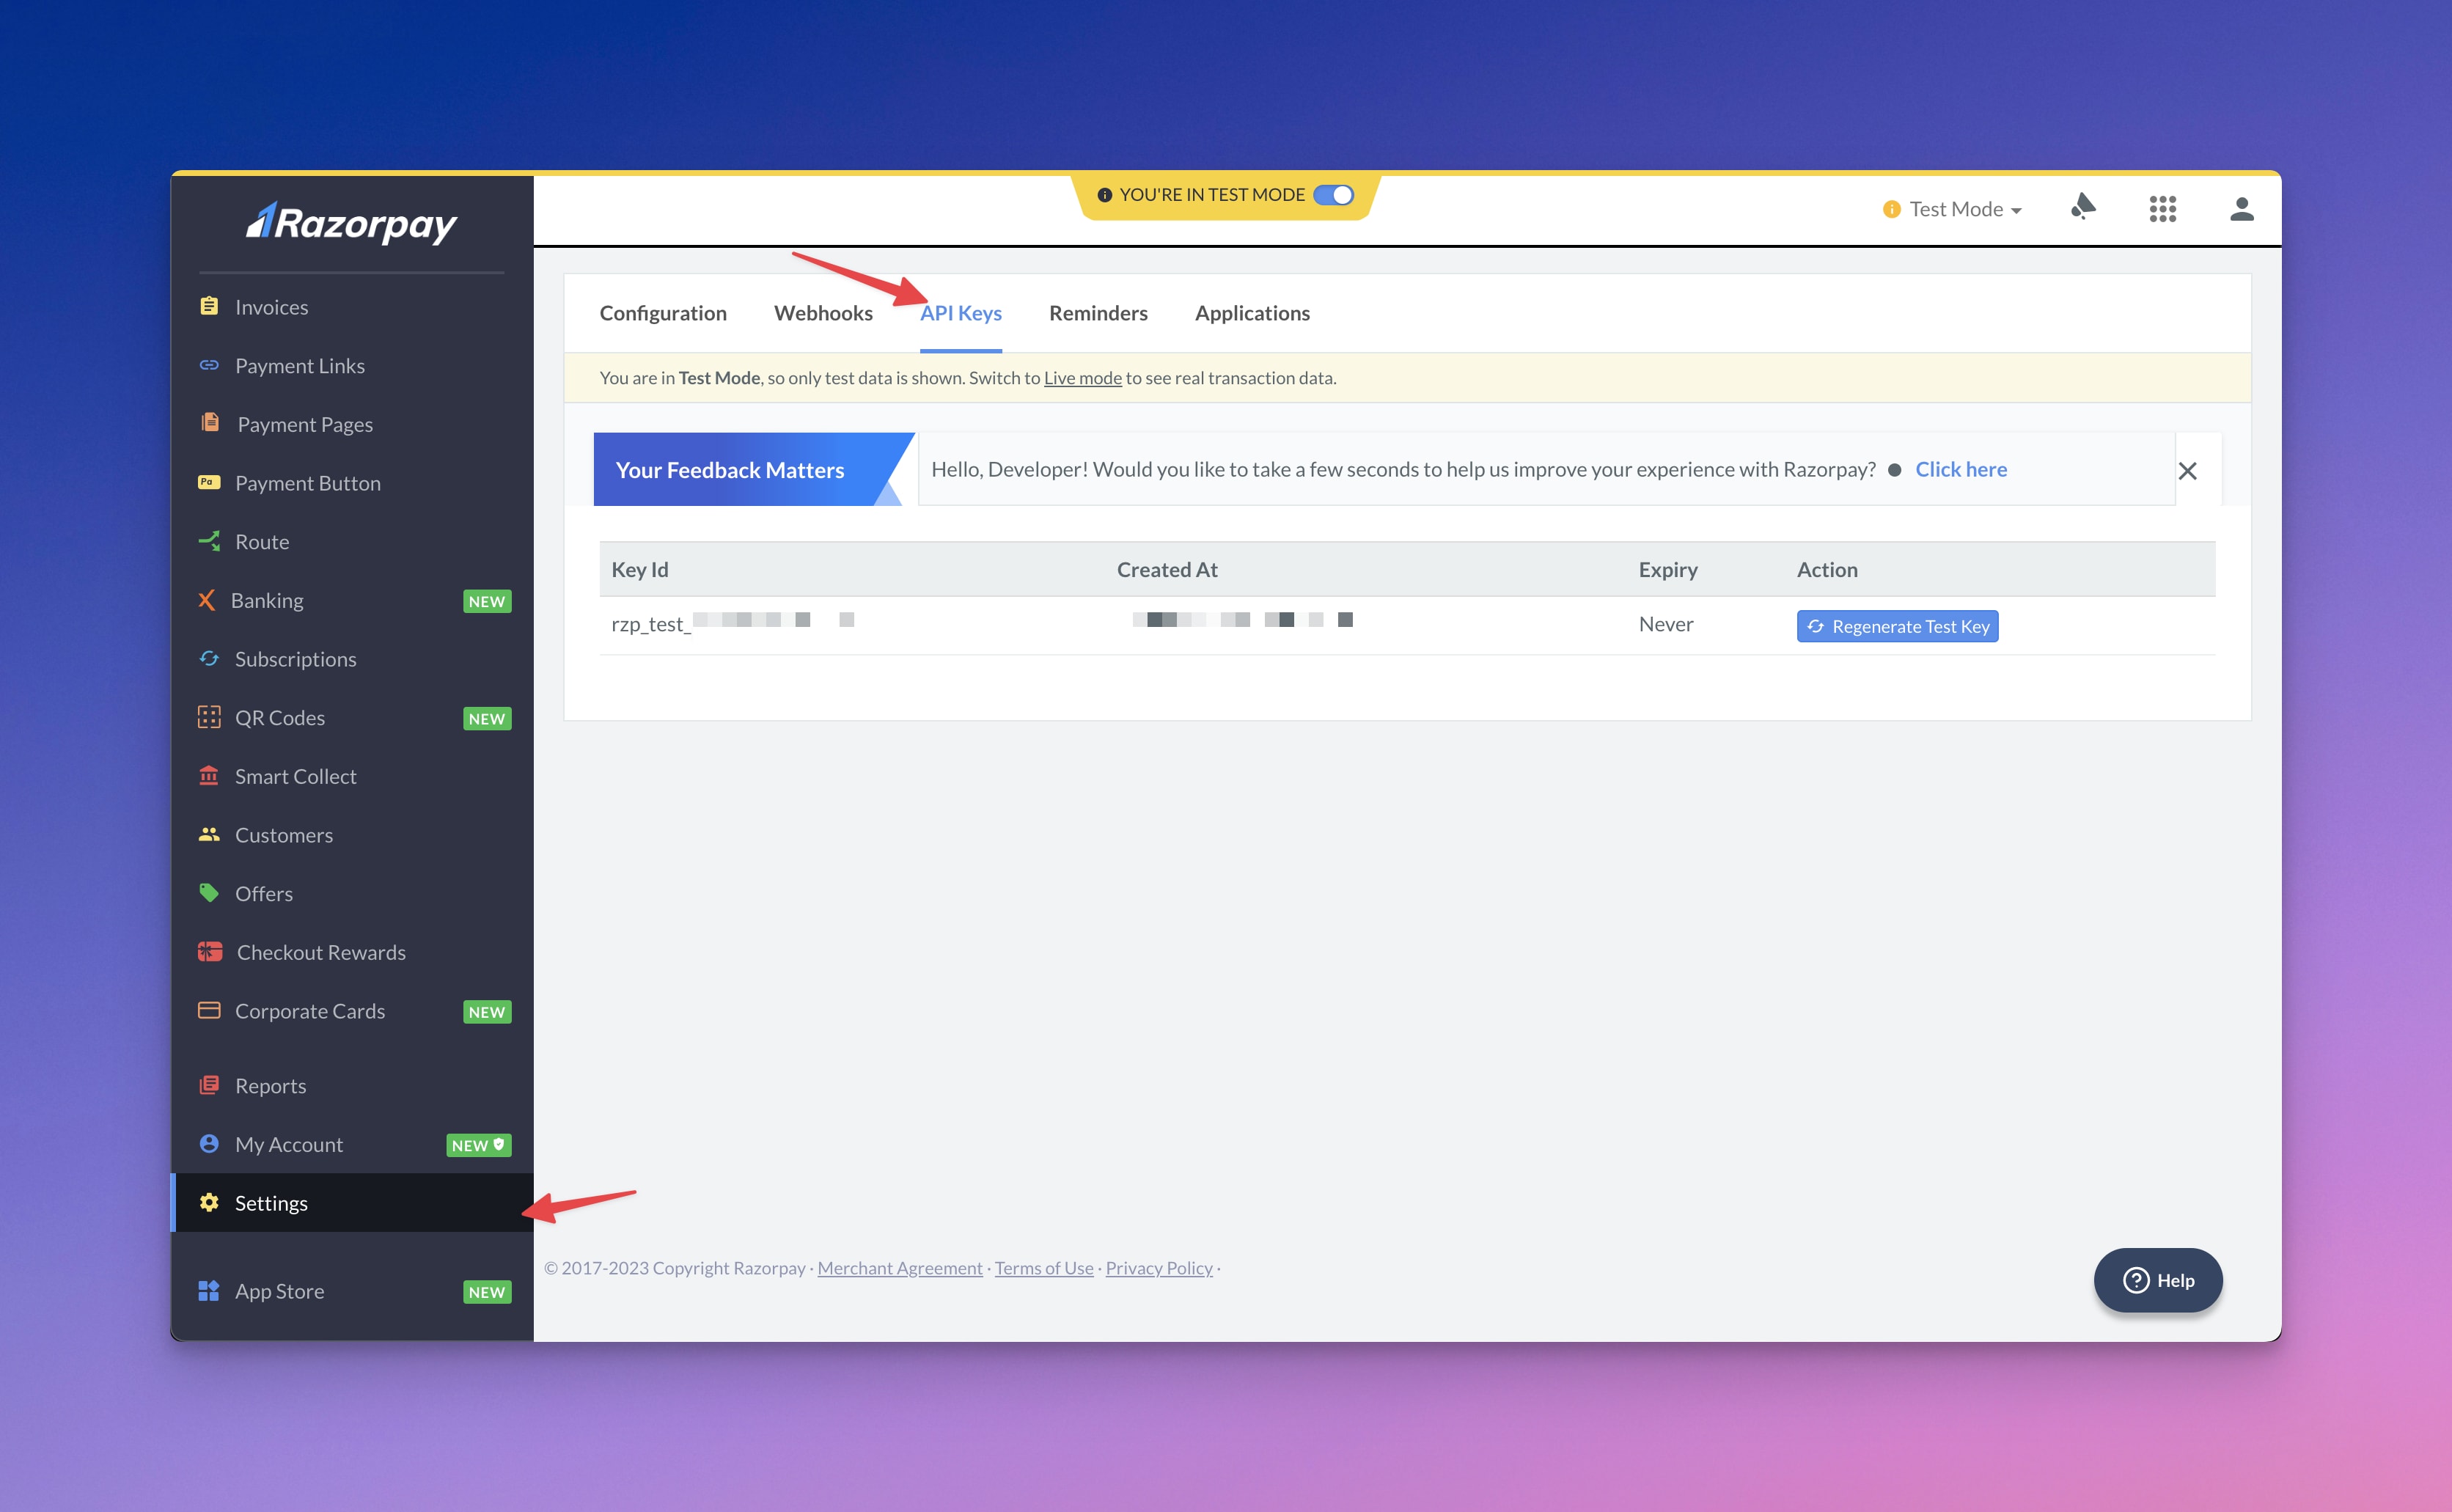
Then, set up the environment variables in your app like this:
RAZORPAY_ID="rzp_test_YOUR_API_ID"
RAZORPAY_KEY="YOUR_API_KEY"
Step 1: Creating API endpoint to generate custom link
In this step, we will create an API endpoint that generates a custom link for payment.
It'll be used in the frontend to make the actual payment.
// pages/api/razorpay.js
const Razorpay = require("razorpay");
const shortid = require("shortid");

// Initialize razorpay object
const razorpay = new Razorpay({
    key_id: process.env.RAZORPAY_ID,
    key_secret: process.env.RAZORPAY_KEY,
});

async function handler(req, res) {
// TODO: Make sure to handle your payment here.
// Create an order -> generate the OrderID -> Send it to the Front-end
// Also, check the amount and currency on the backend (Security measure)
const payment_capture = 1;
const amount = 1 * 100 // amount in paisa. In our case it's INR 1
const currency = "INR";
const options = {
    amount: (amount).toString(),
    currency,
    receipt: shortid.generate(),
    payment_capture,
    notes: {
        // These notes will be added to your transaction. So you can search it within their dashboard.
        // Also, it's included in webhooks as well. So you can automate it.
        paymentFor: "example_ebook",
        userId: "user_id_here",
        productId: 'your_product_id'
    }
};
}
export default handler
Heads up!
If you want to make payments from a specific domain in live mode, Razorpay must approve the domain.
If it's not approved, you won't be able to accept payment. So make sure it's approved and ready.

Step 2: Using Razorpay in Frontend
To process payments from the client-side of our app, we will call our custom API from the frontend and use the response to initiate the payment.
Here is the code for how to do it in Next.js:
// YourBillingComponent.jsx
import Script from "next/script";
export default function YourBillingComponent() {
  const makePayment = async ({ productId = null }) => {
    // Make API call to the serverless API
    const data = await fetch("/api/razorpay", {
      method: "POST",
      headers: {
        // Authorization: 'YOUR_AUTH_HERE'
      },
      body: JSON.stringify({ productId }),
    }).then((t) => t.json());
    const options = {
      name: data.name,
      currency: data.currency,
      amount: data.amount,
      order_id: data.id,
      description: data.amountDesc,
      // image: logoBase64,
      handler: function (response) {
        // Validate payment at server - using webhooks is a better idea.
        // alert(response.razorpay_payment_id);
        // alert(response.razorpay_order_id);
        // alert(response.razorpay_signature);
      },
      prefill: {
        name: "John Doe",
        email: "jdoe@example.com",
        contact: "9876543210",
      },
    };

    const paymentObject = new window.Razorpay(options);
    paymentObject.open();

    paymentObject.on("payment.failed", function (response) {
      alert("Payment failed. Please try again. Contact support for help");
    });
  };

  return (
    <>
      <Script
        id="razorpay-checkout-js"
        src="https://checkout.razorpay.com/v1/checkout.js"
      />

      <button
        onClick={() => {
          makePayment({ productId: "example_ebook" });
        }}
      >
        Buy
      </button>
    </>
  );
}
That's it. You should be able to make payments using Razorpay.
Step 3: Automating the workflow post payment (optional)
Post payment you can further automate the workflow using tools like PipeDream or Zapier using Razorpay's webhooks.
And from there you can automate it based on your use case like sending you push notification to automatically sending digital assets post payment, etc.
Happy payment workflows!